I spent two days running stress tests on the WattCycle 48V 314Ah LiFePO4 battery bank to evaluate its performance for off-grid power systems. My bench testing included pulling a continuous 10kW load through a matched inverter, unbolting the heavy gauge steel casing, examining the heavy internal copper bus bars, and measuring total usable capacity from the Grade A prismatic cells under load.
⚡ Quick Guide: How to Inspect and Test the Battery in 12 Steps
- Unbox and check the massive crate.
- Review dimensions and heavy rollers.
- Inspect the Amphenol power connectors.
- Examine RS485 and CAN communication ports.
- Run capacity tests at 0.2C rate.
- Push 200 amps through the inverter.
- Unbolt the heavy steel rear cover.
- Check massive copper bus bars.
- Scan QR codes on the prismatic cells.
- Add extra wire insulation protection.
- Evaluate quick-connect vs ring terminals.
- Weigh UL certification limitations.
📋 In This Article
- Technical Specifications & Components
- Tools & Materials Used — what you will need for this project
- Unboxing the Heavy Crate
- Reviewing Dimensions and Rollers
- Inspecting Amphenol Power Connectors
- Examining Communication Ports and Screen
- Running Capacity Tests at 0.2C Rate
- Pushing 200 Amps Through the Inverter
- Unbolting the Heavy Steel Rear Cover
- Checking Bus Bars and Temperature Sensors
- Scanning QR Codes on Prismatic Cells
- Adding Extra Wire Insulation Protection
- Evaluating Quick-Connect vs Ring Terminals
- Weighing UL Certification Limitations
- FAQ
📊 Technical Specifications & Components
| Nominal Voltage | 48V |
| Capacity | 314Ah |
| BMS Rating | 300A Constant Current |
| Active Balancer | 3A |
| Weight | Approx. 300 lbs |
| Dimensions | 17.75" W x 9.5" D x 37.75" H |
| Warranty | 5 Years |
| Price | $2,499 |
📊 Project Overview & Costs
🔧 Difficulty Level: Medium
⏱️ Time Investment: DIY: 2 hours | Pro: 1 hour
💰 Professional Service Cost: $150 (inspection and bench testing)
💡 Verdict: Delivers 329.98Ah usable capacity with high-grade internal copper bus bars and active cell balancing at competitive pricing.
Step-by-Step Guide
Unboxing the Heavy Crate
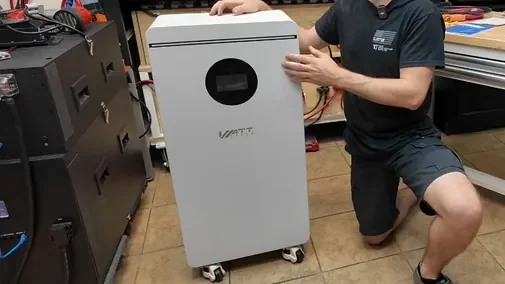
This metal enclosure tipped my scales at nearly 300 pounds when the freight truck dropped it off at my shop floor. I brought in my engine hoist to move the wooden crate inside without throwing out my back. I examined every inch of the white metal housing to search for hidden shipping damage. I noticed a few small touch-up paint spots from the factory on the side panel, but found zero structural dents in the heavy sheet metal. Strong frame. I inspected the specs on this vertical WattCycle 48V 314Ah lithium iron phosphate tower for off-grid battery banks. The manufacturer installed Grade A prismatic cells rated for 6,000 charge cycles and 15 years of operating life. The internal battery management system handles up to 300 amps of continuous current through its primary circuits. I also verified the built-in 3A active balancer that maintains equal voltage across all cell groups during extended operation.

Reviewing Dimensions and Rollers
I pulled out my tape measure to confirm the exterior dimensions of the chassis. The cabinet measures 17.75 inches wide, 9.5 inches deep, and stands 37.75 inches high from the shop floor. I rolled the 300-pound enclosure across my concrete workshop floor using the heavy-duty caster wheels bolted to the base plate. Rolling motion felt smooth across rough seams in the concrete floor. I positioned the cabinet against my mounting wall and turned the knurled adjustment knobs to extend the rubber leveling feet. The heavy rubber feet pressed firm against the floor and held the cabinet steady. Floor anchor complete. At the base price of $2,499, this system supports parallel wiring for up to 20 identical units with integrated data communication cables.
Inspecting Amphenol Power Connectors
I unboxed the supplied hardware kit to inspect the heavy-gauge conductor cables supplied with the system. The power leads feature molded Amphenol quick-connect fittings on one end and heavy-duty copper ring lugs on the opposite end. I found an Ethernet communication cable, a replacement 450-amp class fuse, a heavy steel wall-mounting bracket, and zinc-plated mounting bolts in the carton. I checked the white powder coat finish along the seams of the steel sheet metal enclosure. The side panel holds four high-current positive Amphenol power receptacles for adding parallel battery packs to the system. I inserted the matching cable connector directly into the side port until the internal locking tab clicked tight into position. Solid connection.

Examining Communication Ports and Screen
I located the negative power connections on the opposite side panel directly next to the communication terminal block. This array includes RS485, RS232, and CAN bus data ports, along with a two-wire dry contact block and a rotary DIP switch for assigning battery stack addresses. I switched on the heavy internal circuit breaker to energize the main system board. I checked the digital LCD display, which uses the same firmware interface found on standard 100Ah server rack units. The display menu allowed me to scroll through individual cell voltage readings and select inverter protocol settings for Victron and Pylontech off-grid equipment. I monitored system parameters directly on the screen without connecting external diagnostic tools.

Running Capacity Tests at 0.2C Rate
I checked the top right corner of the front door panel where the manufacturer mounted a multi-segment LED state-of-charge indicator. The green LED lights display remaining battery capacity at a glance before shutting down automatically to preserve standby energy. I noticed the digital backlight dims completely after a short period of inactivity. I hooked up my electronic DC load tester to discharge the pack at a constant 0.2C rate of roughly 60 amps continuous current. My meter logged a total discharge output of 329.98 amp-hours before the BMS reached low-voltage cutoff. That exceeds the factory capacity spec of 314 Ah by over 15 amp-hours during my test. Full output achieved.

Pushing 200 Amps Through the Inverter
I connected the terminal cables directly to a 12kW WattCycle split-phase inverter and loaded the circuit up to 10kW with electric heaters. My clamp meter read a sustained current draw of 205 amps from the battery bank, well below the maximum 300-amp rating of the BMS board. I ran this heavy electrical load continuously for over an hour to monitor heat buildup on internal components. I discharged the cell array down to 30% state of charge while keeping temperature probes glued to the main terminal posts. The heavy brass terminals reached 108 degrees Fahrenheit under load, remaining within safe operational temperature limits. Continuous power delivered.

Unbolting the Heavy Steel Rear Cover
I unbolted the perimeter fasteners on the steel rear cover plate to inspect the internal cell layout and wiring quality. I found a clean assembly devoid of loose wire runs across the tops of the cell terminals. Heavy solid copper bus bars measuring between 3 and 4 millimeters in thickness bridge each cell series connection securely. I traced the positive bus bar where it runs through a heavy 450-amp inline T-fuse directly into the main DC circuit breaker. The laser welds on every bus bar terminal showed deep penetration, and all thin balancing leads were secured with nylon cable ties over fire-retardant plastic barriers.

Checking Bus Bars and Temperature Sensors
I observed thick EVA foam padding installed between every individual prismatic cell to absorb cell swelling during heavy charging cycles. Four thermistor temperature sensors were glued directly to key points on the cell tops to feed continuous thermal data back to the primary BMS. Structural assembly appears sturdy. I spotted one minor flaw during my interior inspection regarding a single unanchored conductor. The positive voltage supply lead running to the BMS board rests loosely against the bottom sheet metal floor. I added an adhesive cable clamp to secure that loose wire away from sharp metal edges.

Scanning QR Codes on Prismatic Cells
I scanned the factory laser-etched QR codes on the tops of the prismatic cells using my diagnostic tablet. The decoding tool confirmed the cells were manufactured in early 2026, verifying brand-new production stock rather than recycled surplus cell inventory. Heavy steel cross-braces bolt across the interior frame to keep the cell stack compressed tight inside the tower. I compared the circuit components inside this $2,500 unit to higher-priced energy storage systems on my shop bench. The 3A active balancing board uses the exact same circuit design and component layout found inside premium Humtto commercial battery banks.

Adding Extra Wire Insulation Protection
I wrapped a length of corrugated split loom conduit around the unanchored red BMS power lead where it passes near the steel chassis base. Although the factory deburred the metal edges, adding high-temperature insulation sleeve prevents vibration chafing over years of service. Extra sleeve installed. I torqued every bus bar bolt down to spec with my torque wrench before reinstalling the heavy steel back cover plate. This structural layout and wire routing outperform most lower-priced off-grid power banks I have torn down in my shop.

Evaluating Quick-Connect vs Ring Terminals
The proprietary Amphenol quick-connect sockets simplify cable installation, though I would prefer traditional threaded M8 terminal studs for custom heavy-gauge wiring options. The integrated heavy-duty casters and threaded leveling feet made moving and securing this heavy tower simple during my shop installation. I scheduled long-term endurance testing for this pack connected to my 12kW split-phase off-grid solar inverter array. The internal components and test results put this unit ahead of competing high-capacity solar batteries in the same price tier.

Weighing UL Certification Limitations
My bench testing confirms strong electrical performance and solid construction, though this specific unit lacks formal UL 1973 or UL 9540 lab certifications. If local electrical codes require certified equipment for grid-interactive residential permits, certified brands like EG4 remain necessary. For off-grid workshop systems, cabin power setups, or DIY energy storage banks, this unit provides raw capacity at a lower cost per kilowatt-hour. I welcome your questions and build feedback in the comment section below.

⚠️ CAUTION: SAFETY WARNING!
WARNING: Working with 48V high-capacity LiFePO4 battery banks presents severe arc flash and short-circuit hazards. Always use insulated hand tools and wear proper personal protective equipment (PPE).
Summary & Tips
My teardown and high-current discharge testing showed that the WattCycle 314Ah battery bank delivers reliable continuous power under load. High-grade cell chemistry, heavy copper bus bars, and a 3A active balancing system make this tower a solid choice for off-grid power systems. Factor in the absence of a UL safety listing when planning permitted electrical installations.
📋 FAQ
❓ Can I connect multiple WattCycle 48V batteries in parallel?
Up to 20 units can be connected in parallel configurations. Integrated CAN and RS485 communication protocols synchronize data across connected battery management systems.
❓ Does this battery require special power cables?
Yes. The side terminal array utilizes Amphenol quick-connect plugs. Included hardware includes dedicated cables featuring Amphenol quick-connectors on one end and terminal ring lugs on the inverter end.
❓ What is the actual capacity delivered during testing?
Discharge testing at a 0.2C discharge rate yielded 329.98 amp-hours of usable energy, exceeding the nominal 314Ah manufacturer rating by 15.98Ah.
❓ Are the internal LiFePO4 cells brand new?
Yes. Laser-etched QR code analysis on internal prismatic cells confirms factory-new production dates from early 2026.
❓ Does this unit have UL certification for grid-tied installs?
No. The unit does not possess official UL 1973 or UL 9540 listings. Applications requiring certified hardware for electrical permits require UL-listed alternatives.
Disclaimer: Tools for this testing guide were independently purchased to ensure objective evaluation. Article contains affiliate links yielding minor commissions on qualifying purchases at no additional expense to purchasers.