When your Makita DUR181 18V cordless strimmer loses its cutting power or refuses to start, the culprit is almost always the motor. Replacing it is a straightforward task that doesn’t require specialized equipment or a professional shop. You can get the unit back in service quickly with just a basic screwdriver and a bit of patience.
⚡ Quick Guide: How to Make It in 16 Steps
📋 In This Article
- Technical Specifications & Components
- Tools & Materials Used — what you will need for this project
- Assessing the Makita DUR181 Power Loss
- Why the Motor Fails
- Opening the Trimmer Housing
- Extracting Stubborn Screws
- Removing the Cutting Head
- Inspecting the Motor Assembly
- Removing the Motor and Gearbox
- Cleaning Cooling Vents
- Cleaning the Internal Casing
- Replacing Rubber Dampeners
- Wiring the Motor Correctly
- Installing the New Motor
- Finalizing the Assembly
- Securing the Casing
- Testing the Repaired Trimmer
- Maintenance Tips for Longevity
- FAQ
📊 Technical Specifications & Components
| Model | Makita DUR181 |
| Voltage | 18V DC |
| Motor Type | Brushed DC Motor |
| Transmission | Integrated gear assembly |
| Housing Material | Reinforced molded plastic |
📊 Project Overview & Costs
🔧 Difficulty Level: Easy
⏱️ Time Investment: DIY: 30-45 minutes | Pro: 15 minutes
💰 Professional Service Cost: $40-$60
💡 Verdict: Replacing the motor yourself costs a fraction of buying a new unit.
🛠️ Tools & Materials Used
• Pliers
• Flat-head screwdriver
• Lubricant
Step-by-Step Assembly, Repair, Testing & Inspection
Assessing the Makita DUR181 Power Loss
If your Makita DUR181 is struggling to cut or won't start at all, don't jump to conclusions about the battery or the trigger switch. The problem is usually located at the business end of the tool. It's almost always the motor. When these units lose their torque or fail to kick over, the motor has likely reached the end of its service life. It's a common failure point for these 18V models. You don't need to be an expert to fix this.

Why the Motor Fails
The motor isn't just a simple component; it's the heart of the trimmer. When it burns out from heavy use or constant overloading, the internal commutator gets scorched. This creates dead spots in the windings. If the motor stops on one of these dead sections, it won't spin up until you manually rotate the head. It's a classic sign of internal damage. Replacing the motor is the only real fix.

Opening the Trimmer Housing
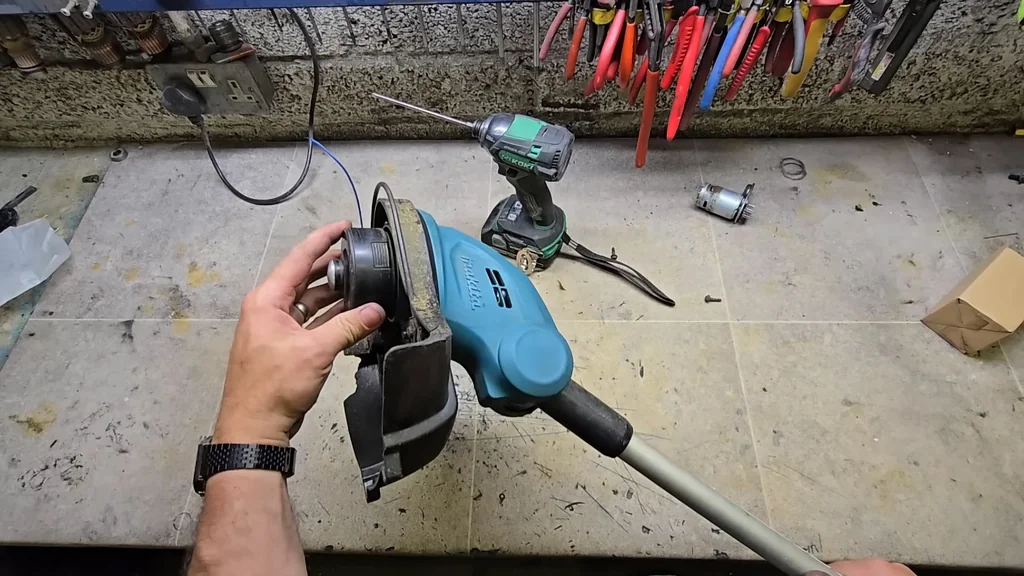
Start by removing the two small screws on the head cover. These are often buried under layers of grass clippings and dirt. They might even be rusted solid. Use a flat-head screwdriver to scrape away the debris and rust before you try to turn them. Give the screws a fighting chance. It's a messy job.

Extracting Stubborn Screws
If the screwdriver slips, don't force it. Grab a pair of pliers to get a firm grip on the screw head. Once you break the seal and get it moving, it should come right out. The rust can be significant on these outdoor tools. It's a necessary struggle.

Removing the Cutting Head
With the screws out, the head should lift off. You might notice some play or wobbling in the cutting head assembly. That's normal for this design. It's not a high-precision mechanism. Just pull it off to expose the motor underneath. You're almost there.

Inspecting the Motor Assembly
Now you can see the motor and the gear reduction unit. It's a compact, simple setup. The motor likely overheated from being pushed too hard. If the commutator is burnt, it's toast. It's just a small, basic motor. Don't overthink it.

Removing the Motor and Gearbox
The motor comes out as a single unit with the mounting plate. It's a direct swap. Just wiggle the shaft to release the pressed-in bearing. Clear out all that dry grass while you're in there. Less resistance is better. It's zero maintenance, really.

Cleaning Cooling Vents
These motors rely on airflow to stay cool. If the vents are clogged with grass, the motor will cook itself. Always clean these out after a long day of work. It extends the life of the tool significantly. Keep it breathing.

Cleaning the Internal Casing
The casing is built to be rugged, but it collects a surprising amount of debris. Wipe everything down to ensure a clean fit for the new motor. It's amazing how much dirt gets inside. A clean tool runs better.

Replacing Rubber Dampeners
Don't lose the small rubber inserts. There are two for the bearing and two larger ones for the housing. They just press into place. They provide the necessary cushion for the motor. Keep track of them.

Wiring the Motor Correctly
When you reconnect the wires, watch the polarity. White goes to red, and black goes to the clear connector. If you swap them, the motor will spin in reverse. That's not helpful at all. Double-check your connections.

Installing the New Motor
Slide the motor assembly back into the casing. It should seat against the rubber dampeners without needing a press. A light touch of grease on the gears is fine, but don't overdo it. The housing isn't sealed. Keep it minimal.

Finalizing the Assembly
This job is easy enough to do on your kitchen table. Just keep the parts organized. It's a solid little machine for light yard work. Don't use it for heavy clearing or it will fail again. It's not a brush cutter.

Securing the Casing
Put the cover back on, preferably with fresh screws if the old ones are rusted. Ensure it's oriented correctly. Once it's tight, the motor should spin freely. It's ready for testing.

Testing the Repaired Trimmer
Pull the trigger and listen to the motor. It should engage instantly with plenty of power. The head should have minimal play. It's a night and day difference. The repair is a success.
Maintenance Tips for Longevity
Keep the vents clear to prevent future overheating. If you keep it clean, it will last much longer. Even if it fails again, the repair is cheap and simple. You've got this.

⚠️ CAUTION: SAFETY WARNING!
Always remove the battery before working on the internal components to prevent accidental activation. Wear eye protection when cleaning out debris.
Summary & Tips
Replacing the motor on a Makita DUR181 is a straightforward DIY project that saves you from buying a new tool. With just a screwdriver, you can restore full power to your trimmer in under an hour. Keep the vents clean to ensure the new motor lasts as long as possible. It's a rewarding fix that keeps your equipment running smoothly.
📋 FAQ
❓ Can I fix this if I have no experience?
Yeah, it's a very simple mechanical swap. You just need a screwdriver and basic hand tools. Honestly, anyone can do this at home.
❓ How do I know if the motor is actually dead?
Usually, the trimmer will lose power or fail to start even with a fully charged battery. If you have to give it a nudge to get it spinning, the motor is definitely the problem. It's a common failure mode.
❓ Is it worth repairing an older Makita trimmer?
Depends on the condition of the rest of the unit. Since the motor is relatively inexpensive, it's almost always worth the effort. It's much cheaper than buying a new kit.
❓ What if the motor spins in the wrong direction?
Usually, that means you swapped the polarity on the wires. Just open it back up and reverse the connections. It's an easy fix.
Disclaimer: I purchased all tools for this guide with my own money to ensure an unbiased review. This post contains affiliate links, meaning I earn a small commission if you make a purchase at no extra cost to you.