Constructing a robust, do-it-yourself off-grid solar setup can dramatically lower your electricity expenses, potentially eliminating them entirely. This Humsienk 8000W inverter and 32 kWh battery arrangement is designed to handle substantial power demands, offering genuine energy independence. My goal here is to help you take back control from the utility company, plain and simple. So, let’s get this system mounted and wired properly.
⚡ Quick Guide: How to Make It in 15 Steps
- Mount the 8000W inverter on fire-resistant board.
- Move and position the heavy 32 kWh battery.
- Wire the battery to the inverter with T-class fuse.
- Install an 80-amp outlet box for house power.
- Connect solar panels for continuous battery charging.
- Power up the system and verify 120V output.
- Installing the T-Class Fuse
- Connecting the Battery Cables
- Wiring AC Output to the House
- Setting Up the AC Outlet Box
- Solar Panel Wiring and Grounding
- Connecting Solar Panels and System Cost
- System Startup Procedure
- Verifying Power Output and Battery State
- Final System Overview and Resources
📋 In This Article
- Technical Specifications & Components
- Tools & Materials Used — what you will need for this project
- Mounting the 8000W Inverter
- Prepping for the Massive Battery
- Heavy Equipment for Battery Transport
- Positioning the Battery in the Shed
- Finalizing System Layout for Off-Grid Use
- Wiring the Inverter: Negative Terminal First
- Installing the T-Class Fuse
- Connecting the Battery Cables
- Wiring AC Output to the House
- Setting Up the AC Outlet Box
- Solar Panel Wiring and Grounding
- Connecting Solar Panels and System Cost
- System Startup Procedure
- Verifying Power Output and Battery State
- Final System Overview and Resources
- FAQ
📊 Technical Specifications & Components
| Inverter Model | Humsienk 48V 8kW Solar Inverter Charger |
| Inverter Power Output | 8000 W (expandable to 12000W or 18000W models) |
| Inverter Output Voltage | 120V or 240V (configured for 120V in video) |
| Inverter Weight | 45 lbs (20 kg) |
| Battery Model | Humsienk 48V 628Ah Home Battery Backup |
| Battery Voltage | 48V |
| Battery Capacity | 32 kWh (628 Ah) |
| Battery Weight | 600 lbs (272 kg) |
| Plywood Mounting Board | 3x5 feet |
| Cement Board Mounting | 3x5 feet |
| Main Outlet Box Rating | 80 Amps total |
| Individual Outlet Receptacle Rating | 20 Amps |
| Solar Panel Quantity | 10 panels |
| Solar Panel Output Fuse | 15 Amps |
📊 Project Overview & Costs
🔧 Difficulty Level: Medium
⏱️ Time Investment: DIY: 2-3 days | Pro: 1 day
💰 Professional Service Cost: $2,000 - $4,000
💡 Verdict: This setup offers significant long-term savings, making it a solid investment for energy independence.
🛠️ Tools & Materials Used
• Plywood
• Cement board
• Screws
• Nuts
• Heavy-duty wire crimper
• Ring terminal
• 80-amp outlet box
• Direct burial cable
• Solar panel PV wire
• Washer
• Circuit breaker
• Excavator
• Tractor
• Hydraulic cart
• 440W Bifacial Solar Panels
• 32 kWh Humsienk LiFePO4 Battery Pack
Step-by-Step Guide
Mounting the 8000W Inverter
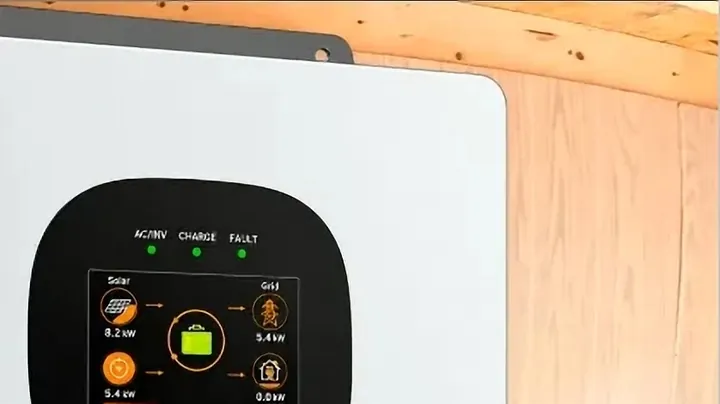
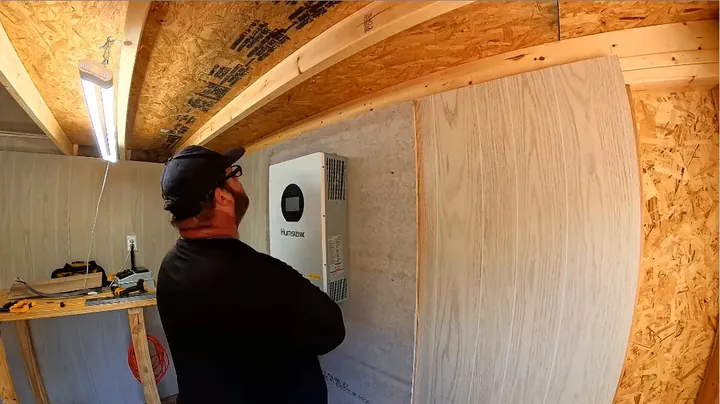
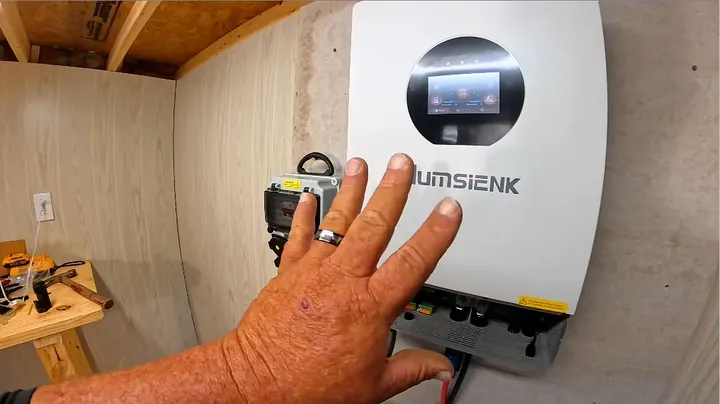
The first task was to secure that 8000W Humsienk inverter firmly to the wall. This particular unit takes the battery's stored energy and converts it into usable AC current, which then powers the entire house. It's a hefty piece of equipment, weighing around 45 pounds. Before the inverter itself was even touched, a robust, fire-resistant mounting base had to be built.
That meant screwing a 3x5 foot sheet of plywood directly into the wall studs, making sure it was perfectly plumb and level. Then, a matching 3x5 foot sheet of cement board was fastened over the plywood. That cement board is essential. It adds a crucial layer of fire protection, which, while unlikely to be needed for an inverter, is always a smart precaution. Safety first.
Prepping for the Massive Battery
Look, safety is always the primary concern, especially when dealing with high-power electrical systems. Even if an inverter fire is a rare occurrence, that cement board serves as inexpensive insurance. Next on the list was the true behemoth: the 32 kWh Humsienk battery. This isn't just a regular car battery; this monster weighs in at roughly 600 pounds.
It's a 48V unit, clearly marked with its positive and negative terminals, and it comes with its own integrated disconnect switch. Before any wiring was even considered, the challenge was figuring out how to get this giant from the back of the truck into its designated location. This was no small lift; it required careful planning and execution.
Heavy Equipment for Battery Transport
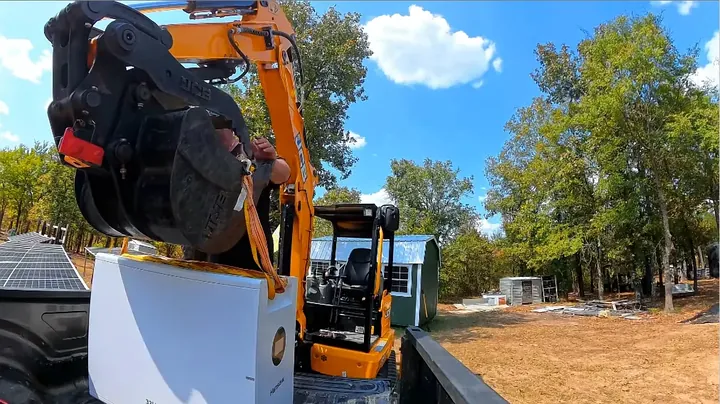
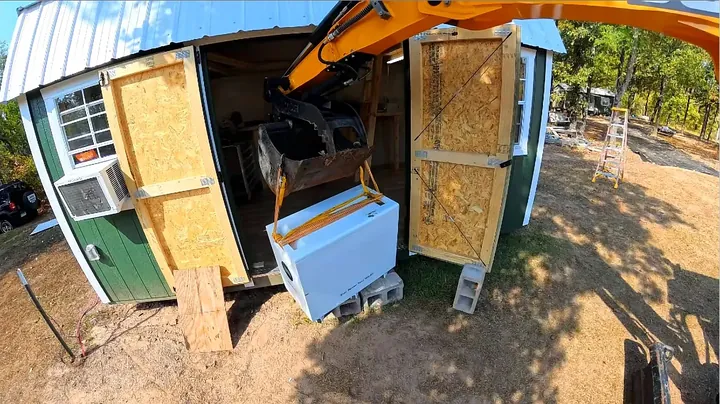
Moving a 600-pound battery isn't a task for one person, or even two. No way. This definitely called for some serious machinery. An excavator was brought in to carefully lift the enormous battery pack out of the truck and maneuver it into position. This wasn't a luxury; it was an absolute necessity for safely handling such heavy equipment. You don't want to risk straining your back or, even worse, dropping this expensive piece of kit. Proper logistical planning saves a lot of headaches, and potential injuries, on a job like this. It's just smart practice.
Positioning the Battery in the Shed
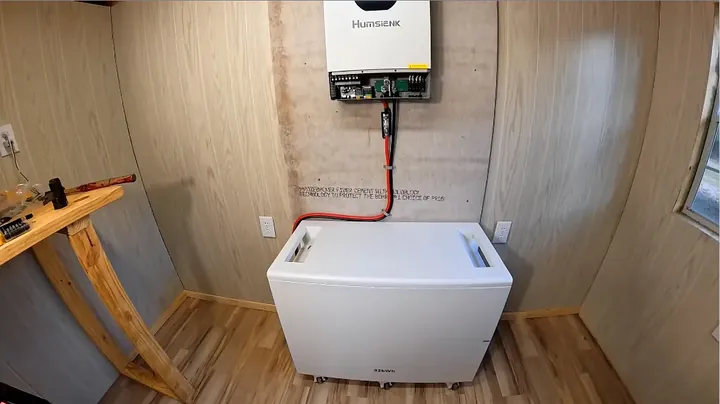
Wrestling that battery into the shed was a real workout. It's heavy, there's no denying it. Everyone's setup is different; some folks might roll it into a garage, while others might need a tractor or a hydraulic cart for porch lifts. We managed to get it done. Once inside, this particular Humsienk battery rolls surprisingly easily on its six built-in wheels. That's a thoughtful feature. Imagine trying to muscle four of these without wheels; that would be utter chaos.
Finding the exact right spot for it is crucial for both easy access and clean, organized wiring.
Everything needs to be neat and tidy for the long haul. This entire setup is geared towards achieving off-grid power, or at the very least, a significant reduction in reliance on the grid. Whether that's fully achievable depends entirely on the size of your home and how much electricity you actually consume daily. For a smaller place, this system could easily keep the lights on around the clock.
Finalizing System Layout for Off-Grid Use
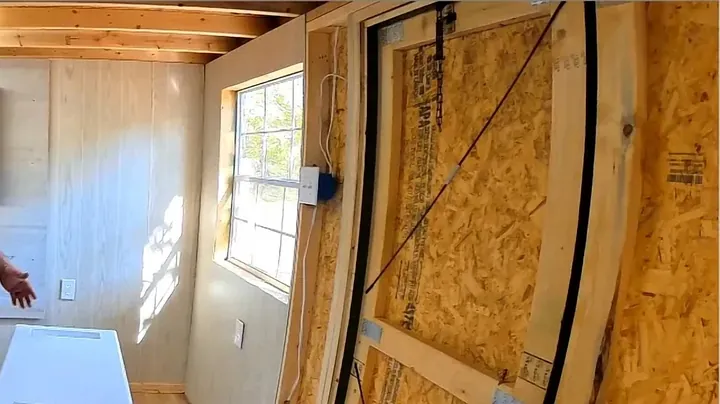
With the inverter secured and the battery settled in the shed, it was time to finalize the entire system layout. This is a straightforward arrangement: one inverter, one battery, and a pair of cables to link them together. The battery's six wheels proved to be a real blessing, making it simple to adjust its position on the concrete floor for optimal cable routing.
The main objective here is energy independence - to sever ties with the utility company. It's that simple. The true feasibility of going completely off-grid relies heavily on your actual power consumption and the overall size of your home. For a small cabin, this specific system provides all the electricity needed, every single day.
Wiring the Inverter: Negative Terminal First
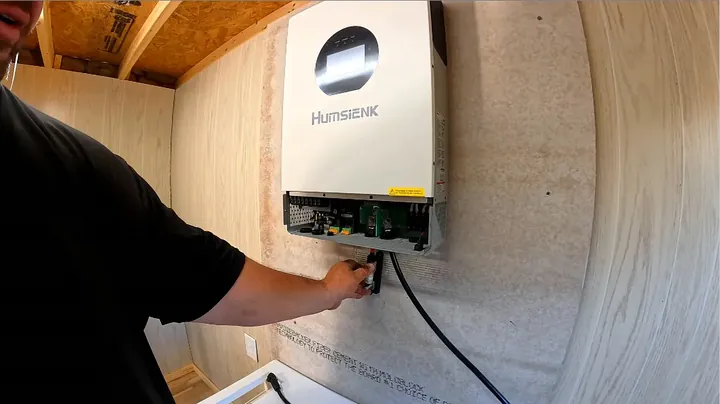
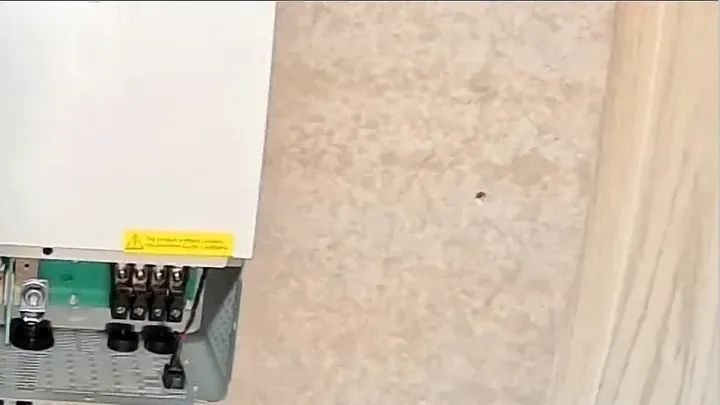
It's time to get this unit wired. First, the inverter's access cover was removed. That's typically just a matter of undoing a few screws. The negative battery cable went in first, sliding smoothly onto its terminal. Then, it was secured tightly with a nut. That's one solid connection done. For the positive side, however, an extra layer of protection was added: a T-class fuse.
Even if the inverter has its own internal fusing, incorporating an external T-class fuse is a smart, safe practice. These have been seen before on some Humsienk (or 'Humdinger' as some folks call them) inverters; they often feature clever magnetic clip-on filters for simple cleaning, which is a nice design improvement compared to having to unscrew a cover every single time maintenance is needed.

Installing the T-Class Fuse
With the negative terminal securely fastened, it was time for the positive run. The T-class fuse was taken, and a heavy-duty ring terminal was crimped onto one end of the cable. For this, a proper crimping tool is needed, not some flimsy pliers. This specific tool isn't always a favorite, but it gets the job done if you give it a good, solid whack.
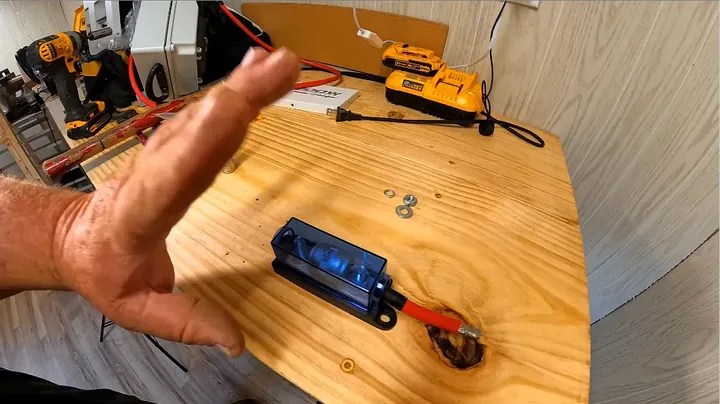
Once the terminal was crimped on tight, that positive cable, now equipped with the T-class fuse, got connected to the inverter's positive terminal. That nut was tightened down thoroughly. Next, the T-class fuse itself needed to be mounted on the wall right near the inverter, keeping the cable run clean and easily accessible. Only then was it time to connect the positive wire coming directly from the battery.
Connecting the Battery Cables
The positive wire, which came supplied with the battery, received a washer and then bolted to the opposite side of that wall-mounted T-class fuse. Making this look clean was important. You really want those wires routed straight and tidy, not a disorganized mess. This isn't just for aesthetics; it significantly helps with troubleshooting if issues arise down the line. It's simple enough: a small cover on the fuse holder was removed to gain access to the terminals. No surprises there. A neat installation is always a professional installation, and that's the standard to aim for.
Wiring AC Output to the House
Once the battery's negative and positive lines were connected, and the T-class fuse cover was back in place, the DC side of the system was all buttoned up. Now, it was time to connect the system to the house. The inverter has terminals for both AC output and AC input. The AC input is typically used for a backup power source, like a generator, which comes in handy on those inevitable cloudy days.
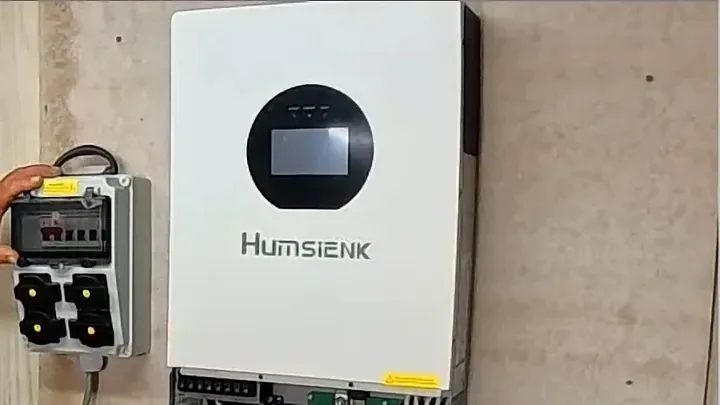
The AC output, however, is what directly feeds your main breaker panel, supplying power to your entire home. An 80-amp outlet box was installed directly onto the wall. Each individual receptacle on this box can handle 20 amps. This box will be wired straight to the inverter's AC output. This is how power gets into the house, especially when the main grid goes down.
Setting Up the AC Outlet Box
Wiring that 80-amp outlet box directly to the inverter's output means instant power as soon as the system kicks on. During a grid outage, a nasty storm, or a full-blown blackout, you just plug right into this box. It's really that simple. Some folks, and that includes this builder, choose to power their entire house this way. It also works perfectly for cabins, hunting lodges, or any off-grid dwelling.
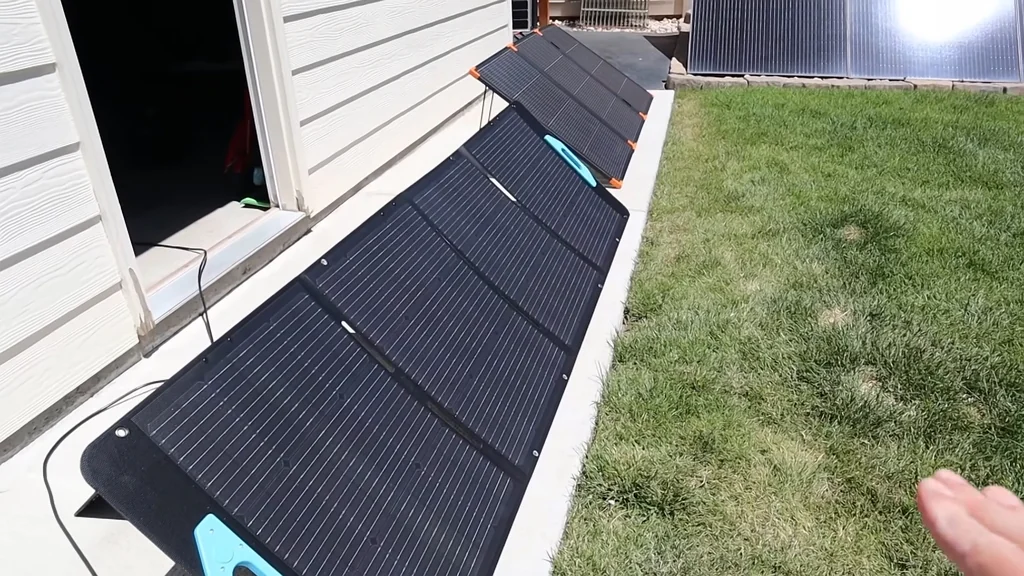
This inverter is quite versatile, capable of either 120V or 240V, but for this particular project, 120V is the choice. Next, the solar panels can't be forgotten. They're the third critical element in this setup, essential for recharging the battery after each use. There's a row of 10 panels installed outside.
Solar Panel Wiring and Grounding
The solar array, which consists of 10 panels, is wired in series. That means positive to negative, panel after panel, to build up the voltage. The negative line from this array goes directly into the ground, running straight to the battery shed. On the very last panel, the remaining positive lead connects to a 15-amp fuse for protection.
Then, this fused positive wire also runs directly into the ground, utilizing direct burial cable. This entire setup is what charges the whole system. Now, let's finish up the outlet box wiring. There's the black wire, which is the live line (L), and the white wire, which is always neutral. Don't mix those up; that's a recipe for trouble.

Connecting Solar Panels and System Cost
And, naturally, there's the ground wire to connect. Safety always comes first. The final major hookup is the solar panels themselves, connecting their positive (red) and negative (black) wires to the inverter's PV inputs. Another solid option for recharging the massive battery, especially on cloudy days or after heavy usage, is a generator.
This provides excellent flexibility. For this particular setup, the 8 kW Humsienk inverter costs about $1100, and the 32 kWh Humsienk battery comes in at $4999. Add another $1500 for the 10 solar panels. The total cost for this entire system hits around $7500. It's a significant investment, but it's built to last and provides real value.
System Startup Procedure
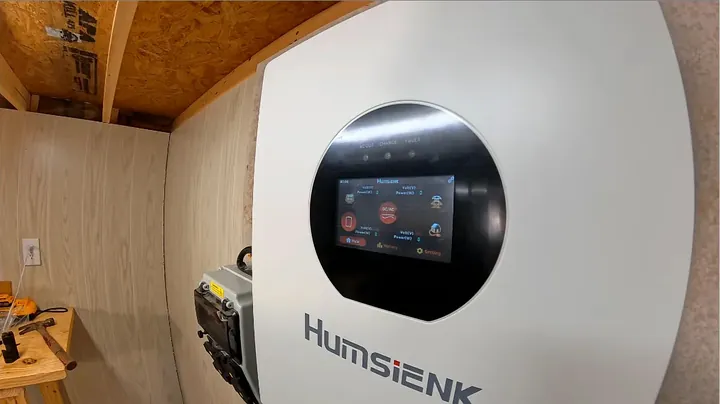
With everything properly wired up, it's time to bring this thing to life. The full PV wire installation is being skipped for now, just to get the system running and verify its basic function. First, the main circuit breaker was flipped on. Breaker's on. Nothing exploded, which is always a reassuring sign.
Next, the main power button on the inverter itself was pressed. After that, a small toggle switch underneath the inverter was found and flipped on as well. The inverter then began its power-up sequence. You'll hear a distinct click as it comes online. Then, a small green AC output indicator light will illuminate, confirming the system is energized and actively pushing out power. It works.
Verifying Power Output and Battery State
Sure enough, with the system fully energized, a solid 120 volts was present at all those outlets. That's a full 8000 watts of power, just like an 8000-watt generator, but with one key difference: no noise. It's silent power, which is a huge bonus. Before wrapping things up for the day, the charge level on the 32 kWh battery was quickly checked.
It was sitting right at 50%, which is completely normal for a factory-shipped unit. This is a robust system: a 32 kWh battery, an 8000W inverter (capable of both 120V or 240V), and 10 solar panels to keep it topped off every day. The total cost, all in, came out to about $7500. This setup is a no-brainer for anyone seeking reliable backup power or aiming for full off-grid living; it performs exactly as it should.
Final System Overview and Resources
This off-grid system, once fully installed and connected to the solar panels, provides a truly robust solution for energy independence. It is considered well-suited for anyone looking to significantly reduce their reliance on the grid or to power a remote property entirely. The components chosen for this build are powerful and explicitly designed for continuous operation. If you're interested in constructing a similar system, all the specific parts used in this build are conveniently linked in the video's description. It's a proven setup that can be trusted.
⚠️ CAUTION: SAFETY WARNING!
Working with high-voltage DC and AC electrical systems is dangerous. Always disconnect all power sources, verify with a multimeter, and consult a licensed electrician if unsure to prevent severe injury or equipment damage.
Summary & Tips
Setting up a robust off-grid solar system, like this Humsienk 8kW inverter and 32 kWh battery, is a substantial project, but it's a genuine game-changer for achieving energy independence. The initial investment might seem considerable at around $7500, but the long-term financial savings and the peace of mind are truly invaluable. It’s a solid setup. For anyone looking to cut ties with the power company or ensure reliable backup power, this kind of arrangement delivers significant benefits.
📋 FAQ
❓ Is a 32 kWh battery enough to power an entire house off-grid?
Capacity depends on consumption. For a typical small to medium-sized home with careful energy management, 32 kWh can be a good starting point. Heavy loads like central AC or electric heat will deplete capacity quickly. Audit daily energy usage to determine needs. Balance is essential.
❓ Why does cement board use behind the inverter?
Primary reason is fire resistance. While inverter fires are uncommon, a non-combustible surface provides an added layer of safety. It's a low-cost insurance against unexpected incidents. Installation involves screwing it over the plywood mounting board. Simple protection.
❓ Can I expand this 8kW solar system later?
Yes, modular system design allows for expansion. The video notes options for 12kW or 18kW inverters. Additional solar panels can increase charging capacity. Connecting extra battery banks provides more storage. Plan for future power requirements. Scalability is a key feature.
❓ What's the purpose of the T-class fuse between the battery and inverter?
The T-class fuse provides primary DC overcurrent protection. Even with internal inverter fuses, an external, high-amperage fuse like a T-class safeguards main battery cables and the inverter from catastrophic shorts or overloads. It is a critical safety component. It acts as a sacrificial element.
❓ Is it difficult to move a 600-pound battery?
Moving a 600-pound battery is challenging; it requires heavy equipment. The video shows an excavator, but a tractor with a loader or a heavy-duty hydraulic cart are also viable options. Do not attempt manual lifting. Risk of injury or equipment damage is high. Careful logistics planning is required.
Disclaimer: All tools for this guide were purchased with personal funds to ensure an unbiased review. This post contains affiliate links, meaning a small commission is earned if you make a purchase at no extra cost to you.