Getting a Victron Lynx Distributor set up correctly means making sure the Smart Shunt is integrated and those LED indicator lights are fully operational. This isn’t just about bolting parts together; it’s about smart power management and clear diagnostics. This is a custom solution that avoids the expensive Victron BMS but still delivers full visibility and strong DC load distribution. It’s a solid piece of work.
⚡ Quick Guide: How to Make It in 15 Steps
- Connect shunt to battery negative.
- Add custom 5V LED cable.
- Prepare 300A disconnect switch.
- Drill out oversized mounting holes.
- Apply cutting fluid, file burrs.
- Verify smooth connection surfaces.
- Mount disconnect switch securely.
- Tighten switch, no extra washers.
- Orient shunt for cable clearance.
- Install components during live work.
- Wire shunt: red positive, black negative.
- Land all positives to one terminal.
- Establish dedicated component ground.
- Route shunt positive sense line.
- Complete integrated power unit.
📋 In This Article
- Technical Specifications & Components
- Tools & Materials Used — what you will need for this project
- Setting Up the Lynx Distributor & Smart Shunt
- Adding the Custom LED Indicator Cable
- Preparing the Disconnect Switch
- Drilling Out Mounting Holes for Components
- Applying Cutting Fluid and Deburring
- Ensuring Smooth Contact Surfaces
- Mounting the Disconnect Switch
- Securing the Disconnect Switch Bolts
- Orienting the Smart Shunt for Cable Access
- Capturing Live Installation Insights
- Wiring the Smart Shunt Connections
- Consolidating Positive Load Connections
- Establishing Component Ground Points
- Routing the Shunt Positive Sense Line
- Completing the Integrated Power Unit
- FAQ
📊 Technical Specifications & Components
| Victron Lynx Distributor | DC load distribution, fuse acceptance, LED indicators |
| Spartan Battery Switch | Minimum 300 amp continuous rating |
| Custom LED Cable Input | 12V DC |
| Custom LED Cable Output | 5V DC to two Lynx Distributor LED pins |
| Drill Bit Size | 27/64 inch (for switch and shunt mounting) |
| Socket Size for Switch | 9/16 inch |
| Socket Size for Victron Terminals | 13 mm |
| Socket Size for Large Switch Nut | 17-18 mm |
| Smart Shunt Connection | Battery negative or system negative |
| Disconnect Switch Feature | Serrated nuts for secure fastening (no lock washer required) |
📊 Project Overview & Costs
🔧 Difficulty Level: Medium
⏱️ Time Investment: DIY: 4-6 hours | Pro: 2-3 hours
💰 Professional Service Cost: $375 - $500
💡 Verdict: DIY completion results in labor cost savings and enhanced system comprehension.
🛠️ Tools & Materials Used
• Victron Lynx Distributor
• Victron Smart Shunt
• Spartan Battery Switch
• LED Cable (custom, with step-down converter)
• Drill bit (27/64")
• Cutting fluid
• File
• Wrench (9/16", 13mm, 17-18mm)
• Jumper wires
• Red wire
• Black wire
• Heat shrink
• Workbench
• Lock washer
Step-by-Step Guide
Setting Up the Lynx Distributor & Smart Shunt
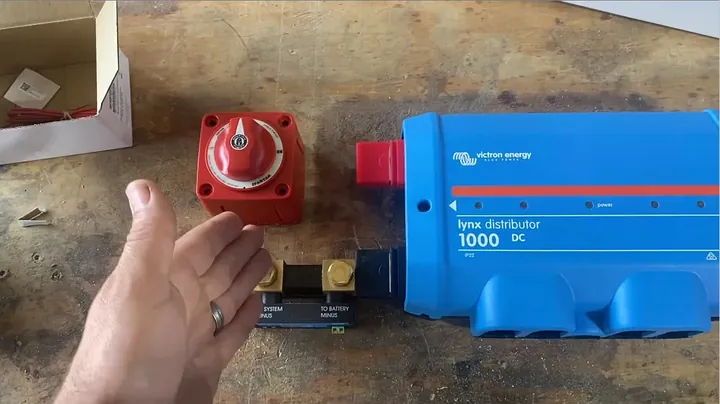
The first step is setting up the Victron Lynx Distributor for all the DC loads. This means running a short jumper wire from the distributor to the main shut-off switch. From there, it typically goes to a main fuse, and then onto the battery positive. On the negative side, another short jumper wire connects to the Smart Shunt, which then ties into the main battery negative. This configuration is a common alternative to a dedicated Victron Lynx BMS or other Lynx shunt. It allows for a more modular system and often costs less to put together. This setup is used in roughly 75-80% of builds these days. It's a nice little device.
Adding the Custom LED Indicator Cable
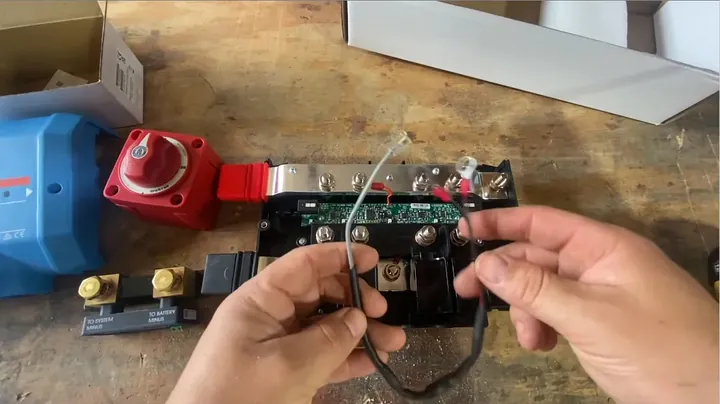
One of the crucial steps here is integrating this specific cable. This isn't just any wire; it's got a small step-down converter hidden inside the heat shrink. It takes 12 volts in, reduces that voltage, and then provides a clean 5 volts to two particular pins on the Lynx Distributor. That's the secret. This 5V feed is exactly what makes all those built-in LED lights on the Lynx Distributor actually illuminate. Without it, those indicators are completely non-functional.
Preparing the Disconnect Switch
The first task is getting these protective covers off. One of the main reasons for this whole custom build is to properly cover up the main hot connection, making sure everything is safe and secure. A substantial shut-off switch is always recommended, something big and heavy-duty. This particular switch is rated for at least 300 amps continuous, which is what a serious system needs. The problem is, the mounting bolts on these heavy-duty switches are almost always too large for the standard holes in the Victron Lynx Distributor. It simply won't fit.
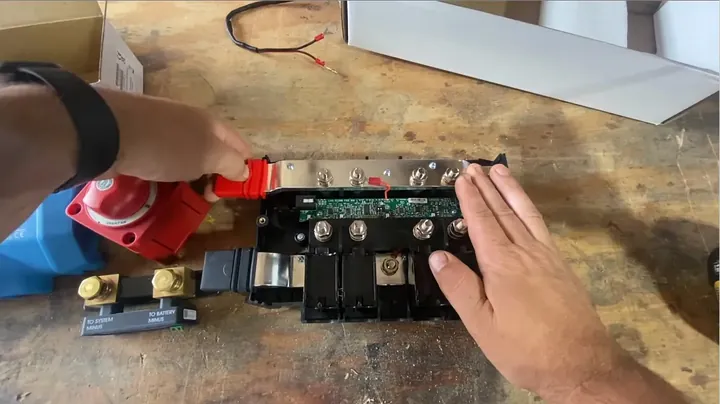
Drilling Out Mounting Holes for Components
Here's the thing: for both the large disconnect switch and the Smart Shunt, the mounting holes have to be enlarged. If there's a workbench that's already seen better days and adding a few more holes doesn't matter, the component can simply be secured right to the table and drilled straight through. It's solid. A 27/64-inch drill bit is the right choice; that size has always worked well. Good, steady pressure is important. This produces bigger, cleaner chips, which is what's wanted for a proper cut. Drill it straight.
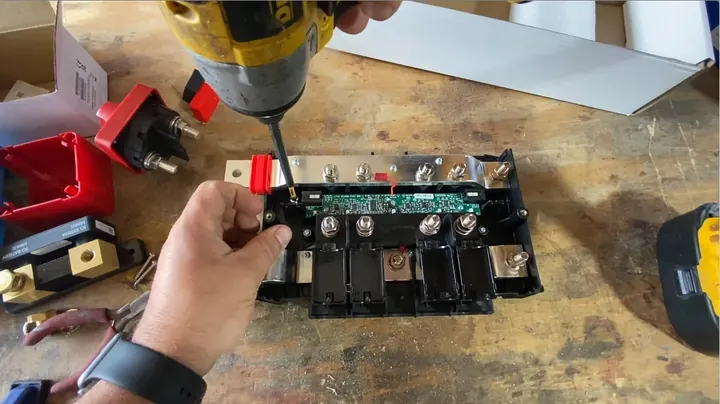
Applying Cutting Fluid and Deburring
Before leaning into the drilling, put a little cutting fluid on the bit. Just a dab is usually enough. It helps keep the bit cool, extends its life, and makes for a cleaner, smoother hole. Once those holes are drilled, taking a file and deburring the edges is essential. A small amount of the tinned coating around the hole might get scraped off, but that's a small trade-off for a clean, safe edge. A proper deburring tool would make this job simple, but one isn't always within reach. It helps a lot.

Ensuring Smooth Contact Surfaces
After all that drilling and deburring, both the top and bottom connection surfaces need to be smooth. For the large disconnect switch, the top connection is the most important for optimal current flow; it must be perfectly flat and clean. The same principle applies to the Smart Shunt, but on its bottom connection. Smooth connections reduce resistance and prevent hot spots from forming. It matters.
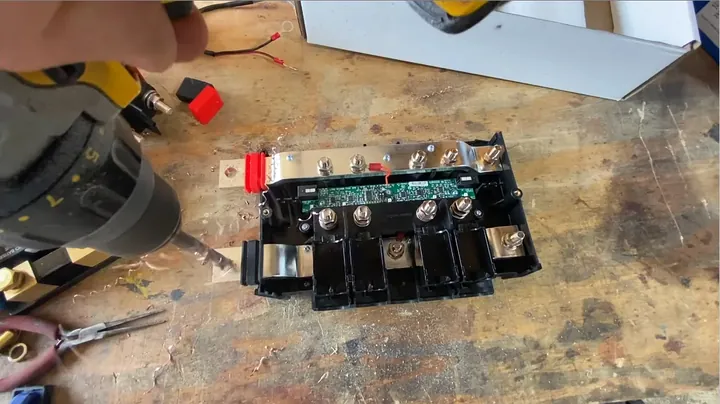
Mounting the Disconnect Switch
A workbench that's already scuffed up means drilling into it doesn't matter one bit. Start by mounting this big disconnect switch. A socket set that includes both standard and metric sizes should always be on hand, because a mix of hardware on these types of jobs is inevitable. For this particular switch, a 9/16-inch socket seems to be the right fit. Always keep both handy. It's a mixed bag.
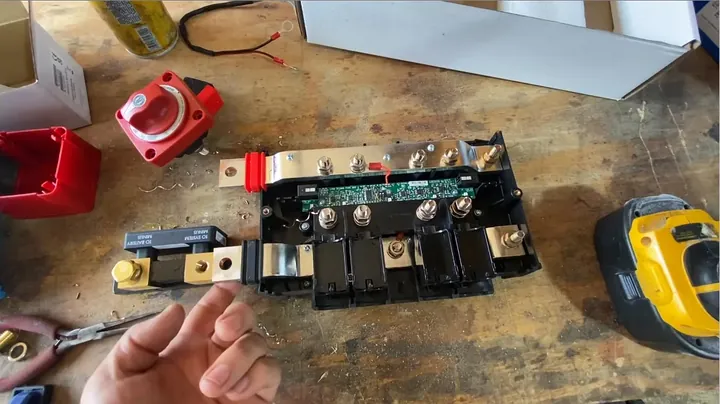
Securing the Disconnect Switch Bolts
When putting the bolts in, always loosen both sides of the connection first. This particular switch is designed not to use a separate washer or a lock nut. Why? It's got those serrated edges built right into the nut itself. Those serrations bite into the mounting surface, creating a secure, vibration-resistant connection without needing extra hardware. Just torque it down good and tight. It's solid.
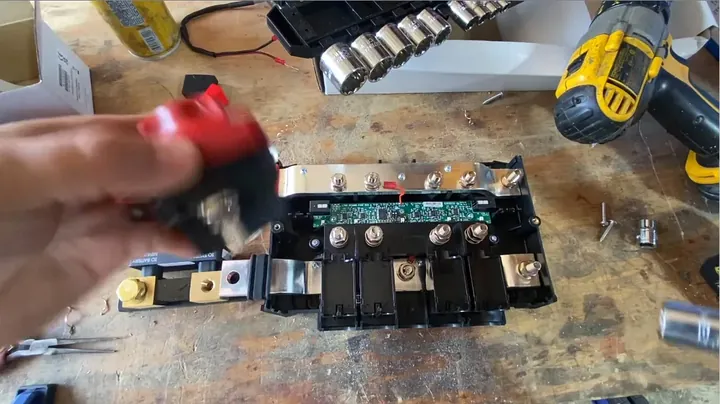
Orienting the Smart Shunt for Cable Access
The Smart Shunt can be oriented in a couple of different ways, but how it's positioned really makes a difference. If mounted one way, getting the data cables routed through can be a real headache. So, a lot of times, it's oriented to provide better clearance for those data cables. Sometimes, there's only enough room for just a lock washer, not a flat washer too, especially when dealing with such a bigger piece of metal like this. That's the reality.
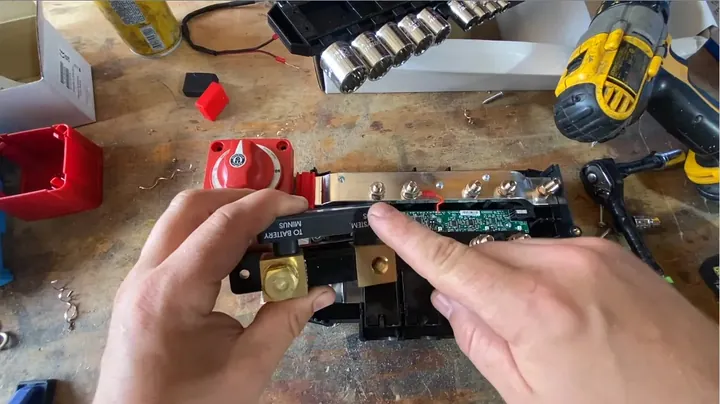
Capturing Live Installation Insights
This is a live install day, right in the middle of getting a system put together. It's a good time to show how this whole thing comes together in real-time. This isn't some staged demo; this is how it actually happens out in the shop. Sometimes it just has to roll with it. No surprises here.
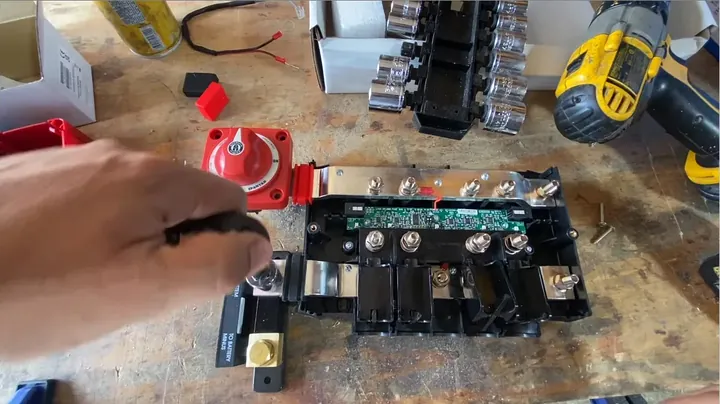
Wiring the Smart Shunt Connections
Next, this unit gets plugged in on the input side. Standard wiring applies: red wire to the positive terminal, black wire to the negative. Always double-check polarity, because mistakes here are expensive. For pretty much all Victron gear, a 13mm wrench or socket is the perfect fit for those terminal nuts. Keep it handy. It's consistent.
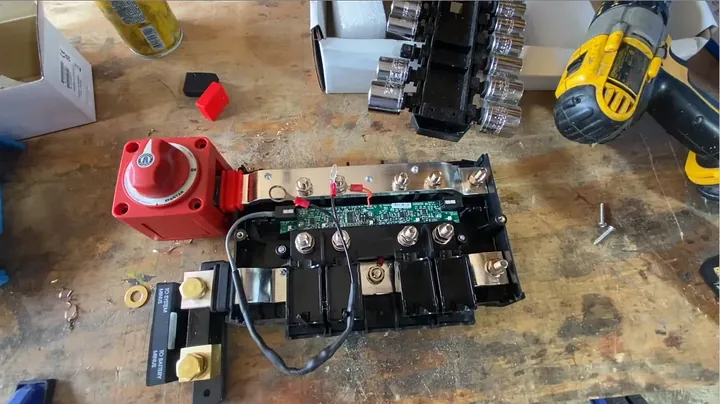
Consolidating Positive Load Connections
When wiring up all the positive DC loads to the Lynx Distributor, they usually all end up connected to one specific terminal. More often than not, it turns out to be the one closest to the main positive input. It just makes for a cleaner, more organized busbar layout. That's the spot. It keeps things tidy.
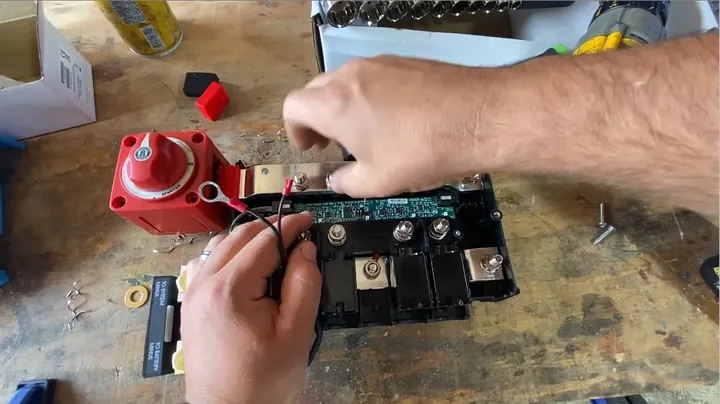
Establishing Component Ground Points
This particular ground connection here is basically just a component ground for this small unit. Or, for anything else that needs its own dedicated ground, like a Victron Cerbo GX or similar monitoring devices. Usually, the main system ground is handled on one of the larger lines, but these smaller components often benefit from their own isolated ground point. It's a small detail. It matters.
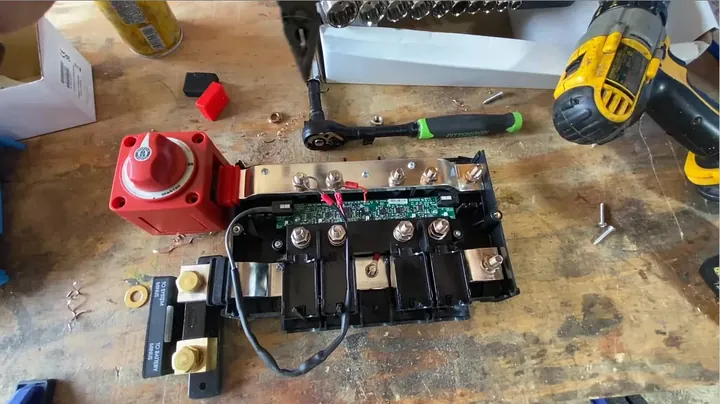
Routing the Shunt Positive Sense Line
Now, typically, the positive sense line for the shunt would also run into this same area. However, that particular wire is usually routed through a dedicated cable tray, which is typically mounted lower down in the system. For this demonstration, it's not included directly in this bundle, but just so you know, it's not forgotten—it belongs there. Getting all these wires tucked in and still keeping the indicator lights visible can be a little tricky, but it's definitely doable. It fits.
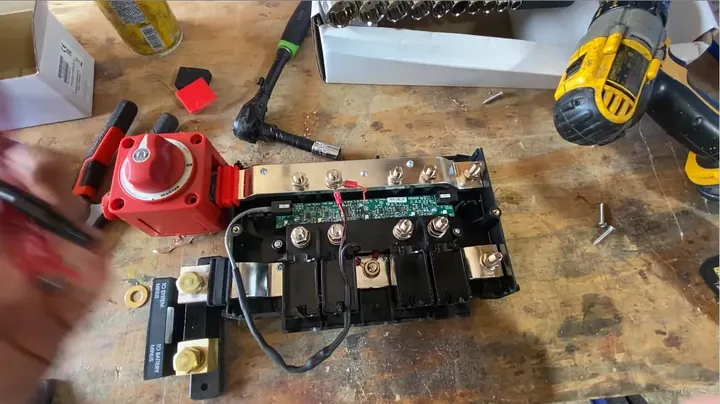
Completing the Integrated Power Unit
There you have it. This is the device that Victron should be manufacturing themselves. It's a truly integrated, all-in-one unit that combines a heavy-duty disconnect switch, the essential Smart Shunt for accurate monitoring, the Lynx Distributor with its individual fuses, and those crucial LED indicator lights, all ready to operate. This setup provides comprehensive power management and diagnostics in a compact package. It's a clean setup. Tell us what you think.
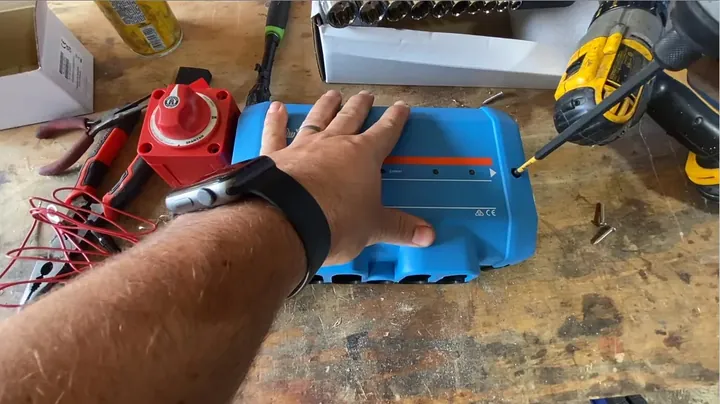
⚠️ CAUTION: SAFETY WARNING!
Working with high-current DC systems carries a risk of severe electrical shock and fire. Always disconnect battery power before making connections and double-check all polarities.
Summary & Tips
This custom Victron Lynx Distributor setup, complete with a Smart Shunt and functional LED indicators, offers a robust and practical solution for managing DC loads. Bypassing the full Victron BMS with this combination saves some cash without sacrificing essential monitoring and safety features. It's a solid, integrated unit that gets the job done efficiently. The result is reliable power distribution and clear diagnostics, all in one compact package.
📋 FAQ
❓ Why build this custom setup instead of buying a Victron BMS?
This custom setup provides a very similar functionality to a full Victron BMS, but often at a lower cost. Robust DC load distribution, accurate current monitoring with the Smart Shunt, and functional LED indicators are included. It is an effective method for power system management without the higher price tag of a dedicated BMS, especially for systems where advanced BMS features are not strictly necessary. It saves a few bucks.
❓ What's the purpose of the custom LED cable?
The custom LED cable is crucial for getting the built-in indicator lights on the Victron Lynx Distributor to function. The distributor does not provide the necessary 5 volts internally for the LEDs. This special cable contains a step-down converter that takes a 12-volt system input, converts it to 5 volts, and then feeds it directly to the LED pins. Without it, the lights remain non-operational.
❓ Why drill out the holes for the disconnect switch?
The bolts on heavy-duty disconnect switches are typically larger than the standard mounting holes on Victron components. To ensure a secure, robust connection capable of handling high continuous currents, the holes must be enlarged. It is not ideal, but it is the only way to properly integrate a substantial switch rated for 300 amps or more. It's a necessary modification.
❓ How important is filing burrs after drilling?
It is critical. Drilling through metal, especially thicker pieces, leaves sharp edges or 'burrs' around the hole. These burrs can cut into wire insulation, cause short circuits, or prevent components from sitting flush, leading to poor electrical contact. Filing them down creates a smooth, safe surface. This step should not be omitted.
❓ Can I use any disconnect switch for this setup?
No, any disconnect switch cannot be used for this setup. A switch rated for at least 300 amps continuous is required to handle the potential loads from a Victron Lynx Distributor system. Using an undersized switch presents a fire hazard and will lead to premature failure. Heavy-duty marine or RV battery switches are recommended, but expect to enlarge mounting holes to accommodate larger bolts. Specify the correct tool for the application.
Disclaimer: All tools for this guide were purchased with my own money to ensure an unbiased review. This post contains affiliate links, meaning a small commission is earned if you make a purchase at no extra cost to you.