An SSD upgrade on a laptop is, without a doubt, the most effective way to breathe new life into old, sluggish hardware. Those old spinning platters bottleneck modern operating systems, making even a simple boot-up feel like it takes forever. Swapping out a painfully slow 160GB hard disk for a 240GB HP S650 2.5-inch SATA solid-state drive eliminates that constraint immediately. It’s a low-cost, straightforward job that takes me less than thirty minutes on the bench.
⚡ Quick Guide: How to Make It in 11 Steps
- Remove battery and all back panel screws.
- Lift chassis cover to reveal hard drive.
- Carefully detach adjacent Wi-Fi card board.
- Slide old mechanical HDD from bracket bay.
- Unbox new HP S650 240GB solid-state drive.
- Fasten metal mounting caddy onto new SSD.
- Seat SSD and reinstall internal Wi-Fi card.
- Snap plastic bottom panel back into place.
- Drive home all exterior chassis fastening screws.
- Flip notebook open and verify physical hinges.
- Boot machine to confirm SSD in BIOS.
📋 In This Article
- Technical Specifications & Components
- Tools & Materials Used — what you will need for this project
- Removing Chassis Fasteners Across the Base
- Lifting Off the Bottom Access Panel
- Detaching the Obstructing Wi-Fi Card
- Backing Out the Factory Mechanical Hard Drive
- Prepping the HP S650 Solid-State Drive
- Mounting the Caddy to the New Solid-State Drive
- Seating the SSD and Reinstalling the Wi-Fi Board
- Aligning and Snapping the Access Panel
- Driving Home the Bottom Chassis Screws
- Lid Opening and Physical Clearance Inspection
- Entering the BIOS to Verify Storage Recognition
- FAQ
📊 Technical Specifications & Components
| Host Platform | MSI Laptop |
| Original Storage | 160GB 2.5-inch SATA Hard Disk Drive |
| Replacement Storage | HP S650 2.5-inch SATA III SSD |
| Storage Capacity | 240GB |
| Interface Bus | SATA I/II/III (backward compatible) |
| Form Factor | Standard 2.5-inch internal laptop drive bay |
| Fasteners | Phillips-head casing and drive-bracket machine screws |
| Auxiliary Peripheral | Internal Mini PCIe Wi-Fi expansion card |
📊 Project Overview & Costs
🔧 Difficulty Level: Easy
⏱️ Time Investment: DIY: 25 minutes | Pro: 10 minutes
💰 Professional Service Cost: $60 - $90
💡 Verdict: Drive swap performed without professional assistance saves standard bench labor rates. Completion in under thirty minutes of simple bench time.
🛠️ Tools & Materials Used
• HP S650 240GB 2.5-Inch SATA III SSD
• Original 160GB 2.5-inch Laptop Mechanical HDD
• Magnetic parts tray
• Plastic spudger
Step-by-Step Guide
Removing Chassis Fasteners Across the Base
Before I even think about putting a screwdriver to the baseplate, I always pull the main battery right out of its slot. That kills all standby power to the motherboard. Once the laptop's dead, I grab a precision cross-head bit and systematically back out every single fastener around the perimeter and in the center of the lower casing.
I keep my workspace tidy to track all the removed hardware. A magnetic dish is handy for this. These small machine screws strip easily if you use the wrong tip, so I apply firm downward pressure. I also make sure to carefully peel back any factory warranty stickers that might be hiding screw heads. Missing even one of these fasteners means you'll snap the plastic cover right in half.
Lifting Off the Bottom Access Panel
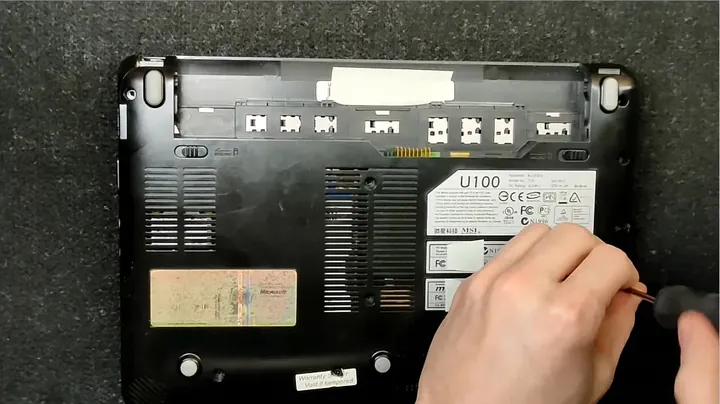
I work a thin edge, sometimes just a fingernail, along the seam where the bottom service hatch meets the main frame. Then I give it a gentle pry. You'll hear small plastic retention tabs unhooking along the border as it separates. I lift the panel carefully to expose the internal hard drive bay. It's important not to yank it off forcefully, or those brittle chassis clips will crack. Once the hatch comes free, I set it aside. This gives me direct visual access to the motherboard layout, the cooling assembly, and the primary drive caddy. Right there, I can see the old 160GB spinning mechanical drive, ready to be removed.
Detaching the Obstructing Wi-Fi Card
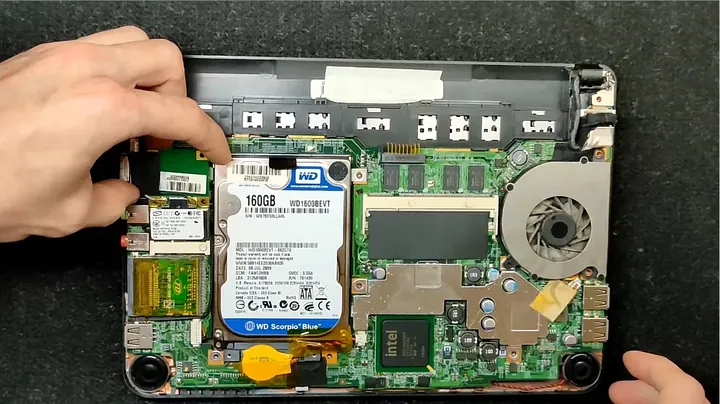
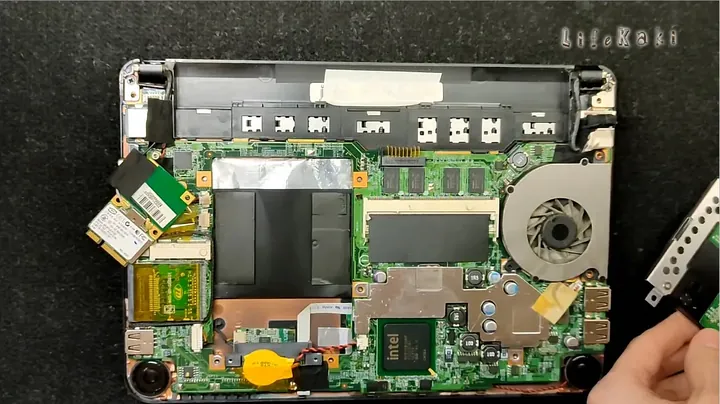
Older notebook architectures often stack internal peripherals right on top of each other. I always handle internal components with care to prevent any static electricity damage. In this MSI chassis, the wireless expansion module actually crowds the space I need to pull out the storage caddy. I carefully detach the Wi-Fi card from the laptop's side. I back out its retaining screw and gently ease the circuit board away from its edge connector, making sure not to strain those delicate antenna leads. Setting that daughterboard aside clears my working area completely.
Backing Out the Factory Mechanical Hard Drive
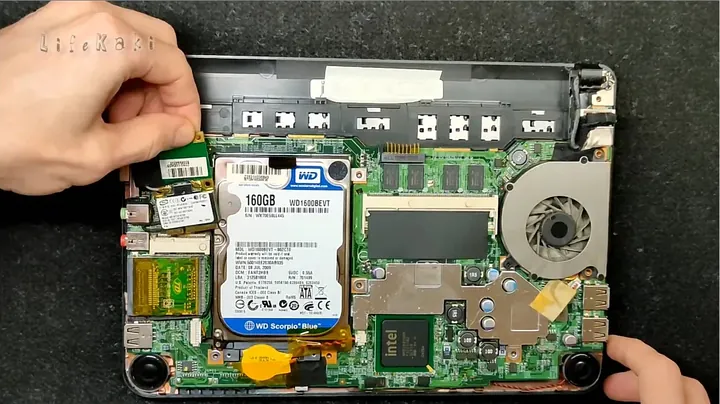
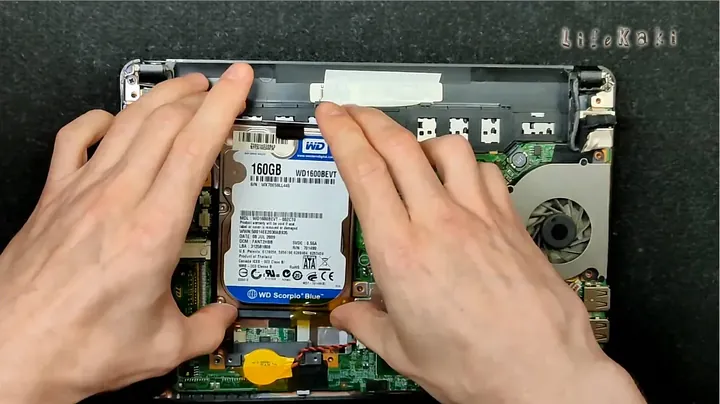
I grip the edges of the drive assembly and pull it horizontally away from the motherboard header. The SATA data and power pins usually slide free without any binding. I remove the hard drive while it's still in its bracket, then take a close look at the caddy. It uses small side screws to keep the drive rigid and aligned with the stationary motherboard socket. Next, I unscrew the metal bracket from the side of the drive. I always set these tiny mounting screws in my tray so they don't roll away on the bench.
Prepping the HP S650 Solid-State Drive
I separate the old hard drive from its protective metal bracket completely, then set that ancient 160GB spinner aside on a shop rag. Now, I prepare the new 240GB HP SSD for installation. I unbox the HP S650 unit and carefully inspect the SATA interface pins to confirm nothing got bent or packed with debris during transit. The plastic enclosure feels featherlight compared to the cast-metal mechanical drive I just pulled out. That weight reduction is a welcome bonus. No moving parts inside.
Mounting the Caddy to the New Solid-State Drive
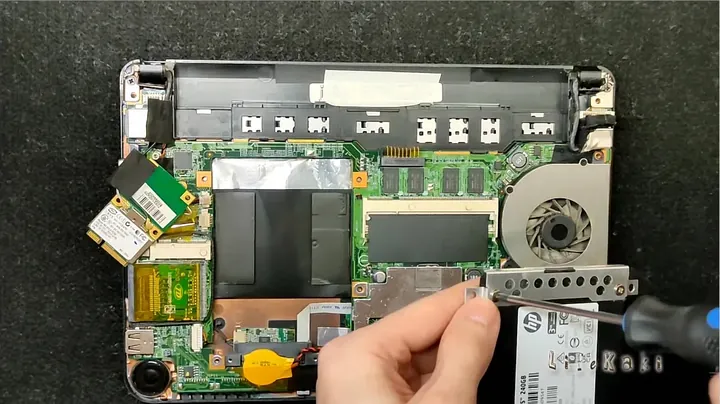
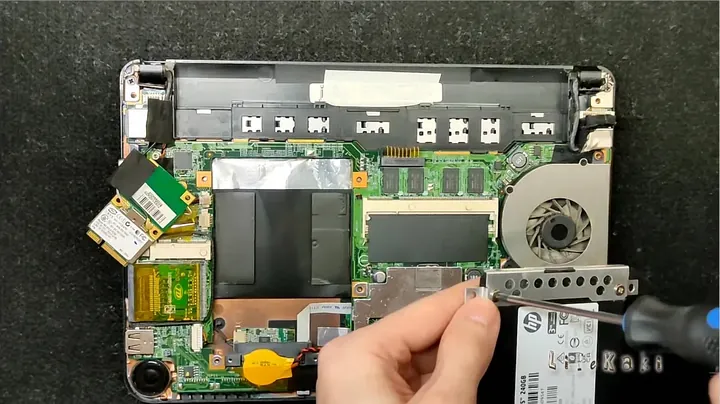
I slide the new solid-state drive into the metal chassis caddy. It's crucial to match the orientation of the SATA power and data rails so they face the correct direction when I insert them back into the bay. I align the metal bracket with the holes on the new solid-state drive. Then, I take those small side screws I set aside earlier and start them in by hand first; that prevents any cross-threading. I tighten the screws firmly to secure the bracket to the SSD. It feels solid, with no rattle whatsoever.
Seating the SSD and Reinstalling the Wi-Fi Board
I drop the bracketed drive into the bay and push it straight into the motherboard SATA receptacle. You'll feel the firm mechanical engagement as the pins slide home. Once it's seated, I secure the SSD into the chassis using the mounting screws. Next, I swing that Wi-Fi module back into its matching socket, making sure the circuit board is seated firmly right next to the drive. I secure the board with its original fastener so it won't walk loose under vibration. That's it.
Aligning and Snapping the Access Panel
I grab the bottom plastic panel and give it a quick wipe to clear any accumulated dust bunnies before dropping it onto the frame. I align the back panel with the laptop's chassis edges, making sure no cables, antenna wires, or grounding foils get pinched between the mating plastic lips. Then, I press down on the corners to snap the panel into place. I work my fingers around the rim until I hear all the retention clips pop together. That's the whole trick—it should feel secure.
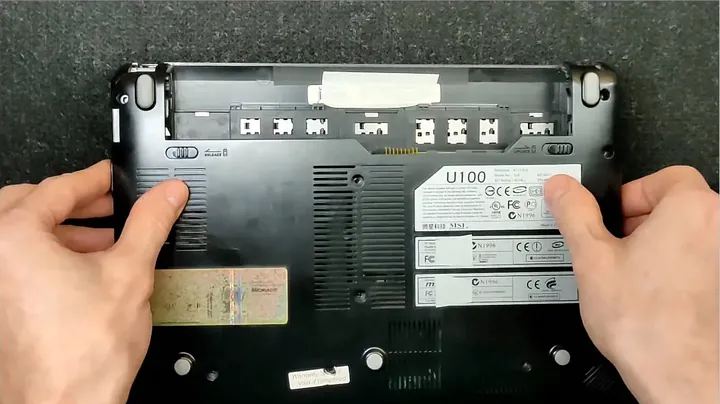
Driving Home the Bottom Chassis Screws
I verify the panel is flush with the laptop's base before driving any fasteners. If I spot a gap, I unclip it and check for any wire snags. Then, I reinsert the screws into the back panel of the laptop. I run each screw down until the head seats, but I'm careful not to overtighten it and crack the thread bosses inside the plastic tub. I tighten all the screws to ensure the panel remains secure. That's good to go. Finally, I reinstall the battery pack into its locking latch.
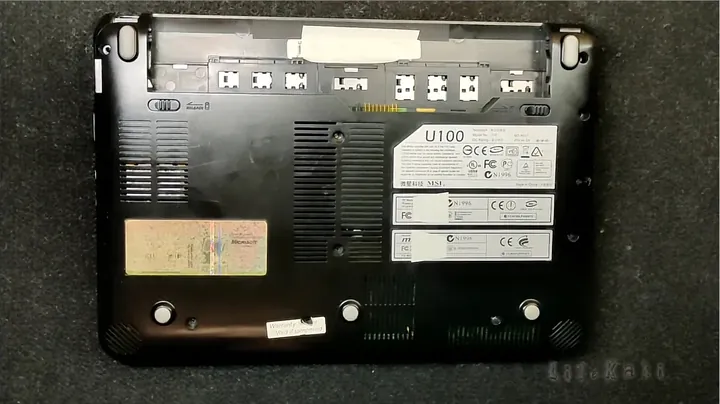
Lid Opening and Physical Clearance Inspection
I confirm all fasteners are tight before powering on the device. Then, I flip the notebook over onto its rubber feet and open the laptop lid to access the keyboard and screen. I make sure the chassis didn't pick up any torsional flex during the screw-down process and check that the display hinges pivot smoothly without any popping or resistance. Everything sits flat on the workbench. Clean physical fit.
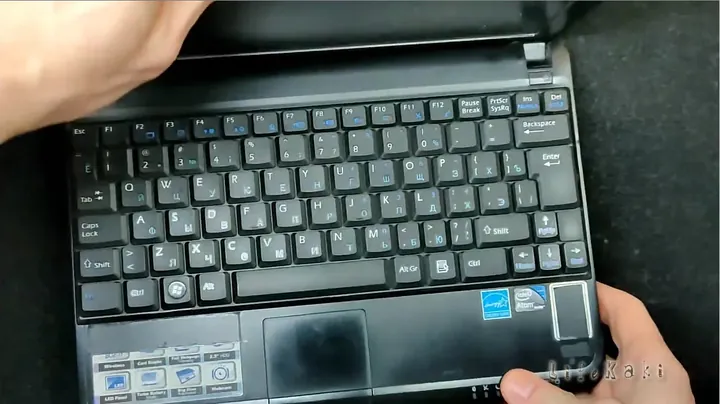
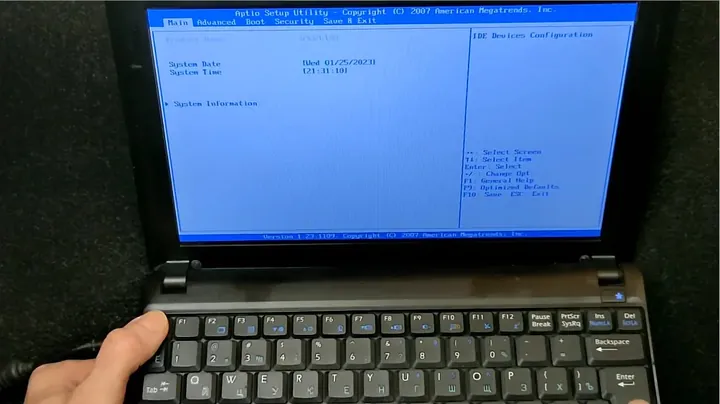
Entering the BIOS to Verify Storage Recognition
I hit the power button and immediately tap the BIOS key—which is usually Delete or F2 on an MSI board. The laptop powers on, and I enter the BIOS menu settings. I head over to the primary storage or system information screen. Sure enough, the controller detects the 240GB HP solid-state drive on the first SATA channel. That confirms my electrical connection is clean and the motherboard chipset communicates with the controller correctly. I save the changes and exit. Success.
⚠️ CAUTION: SAFETY WARNING!
Always eject the external battery pack and discharge residual motherboard capacitor power before touching any internal connectors. Never touch bare circuit components without grounding yourself to prevent electrostatic discharge from killing sensitive memory controller chips.
Summary & Tips
Replacing a mechanical drive with an SSD is the most reliable way I've found to make an aging laptop usable again. This entire bench process took me under thirty minutes and required only basic hand tools. With the BIOS immediately verifying the drive, the machine is now ready for a fresh operating system installation. We're back in business.
📋 FAQ
❓ Can I use any brand of 2.5-inch SATA SSD for this upgrade?
Yes, standard 2.5-inch SATA drives feature universal mounting holes and identical power connectors. Any reputable brand with a 7mm profile will slide directly into the factory bracket. Avoid purchasing an M.2 NVMe drive if the bay is designed for SATA hard drives. Verify form factor compatibility first.
❓ Why did the Wi-Fi card need to be unfastened during removal?
Older chassis designs often pack daughterboards tightly around the storage cavity. On this MSI, the edge of the wireless board physically overlaps the swing path needed to clear the drive's SATA connector. Removing one fastener prevents damage to the delicate PCB.
❓ Do I need to clone the old drive or install Windows fresh?
Both methods are viable, but a fresh operating system installation is typically superior. Cloning transfers years of registry entries and driver clutter that degrades performance. A clean installation of Windows from a bootable USB drive, followed by transferring personal files from the old drive, is recommended.
❓ Will this upgrade make a noticeable difference on an old laptop?
Yes, the performance difference is significant. Mechanical laptop drives consistently bottleneck the CPU during boot cycles and application launches. An SSD delivers near-instantaneous seek times, making the entire machine feel responsive. This is the most impactful, cost-effective upgrade available.
❓ What should I do if the BIOS does not detect the new SSD?
First, verify the physical connection. Remove the access panel, loosen the bracket, and firmly push the drive into the SATA pins to ensure full contact. If detection is still absent, connect the drive to a desktop computer or external enclosure to determine if the drive is faulty from the factory.
Disclaimer: I purchased all tools for this guide with my own money to ensure an unbiased review. This post contains affiliate links, meaning I earn a small commission if you make a purchase at no extra cost to you.